- Interfaces
- Community
- Forums
 »
Schimaera's simple Sage/Sorc DPS UI
PicturesFile Info
»
Schimaera's simple Sage/Sorc DPS UI
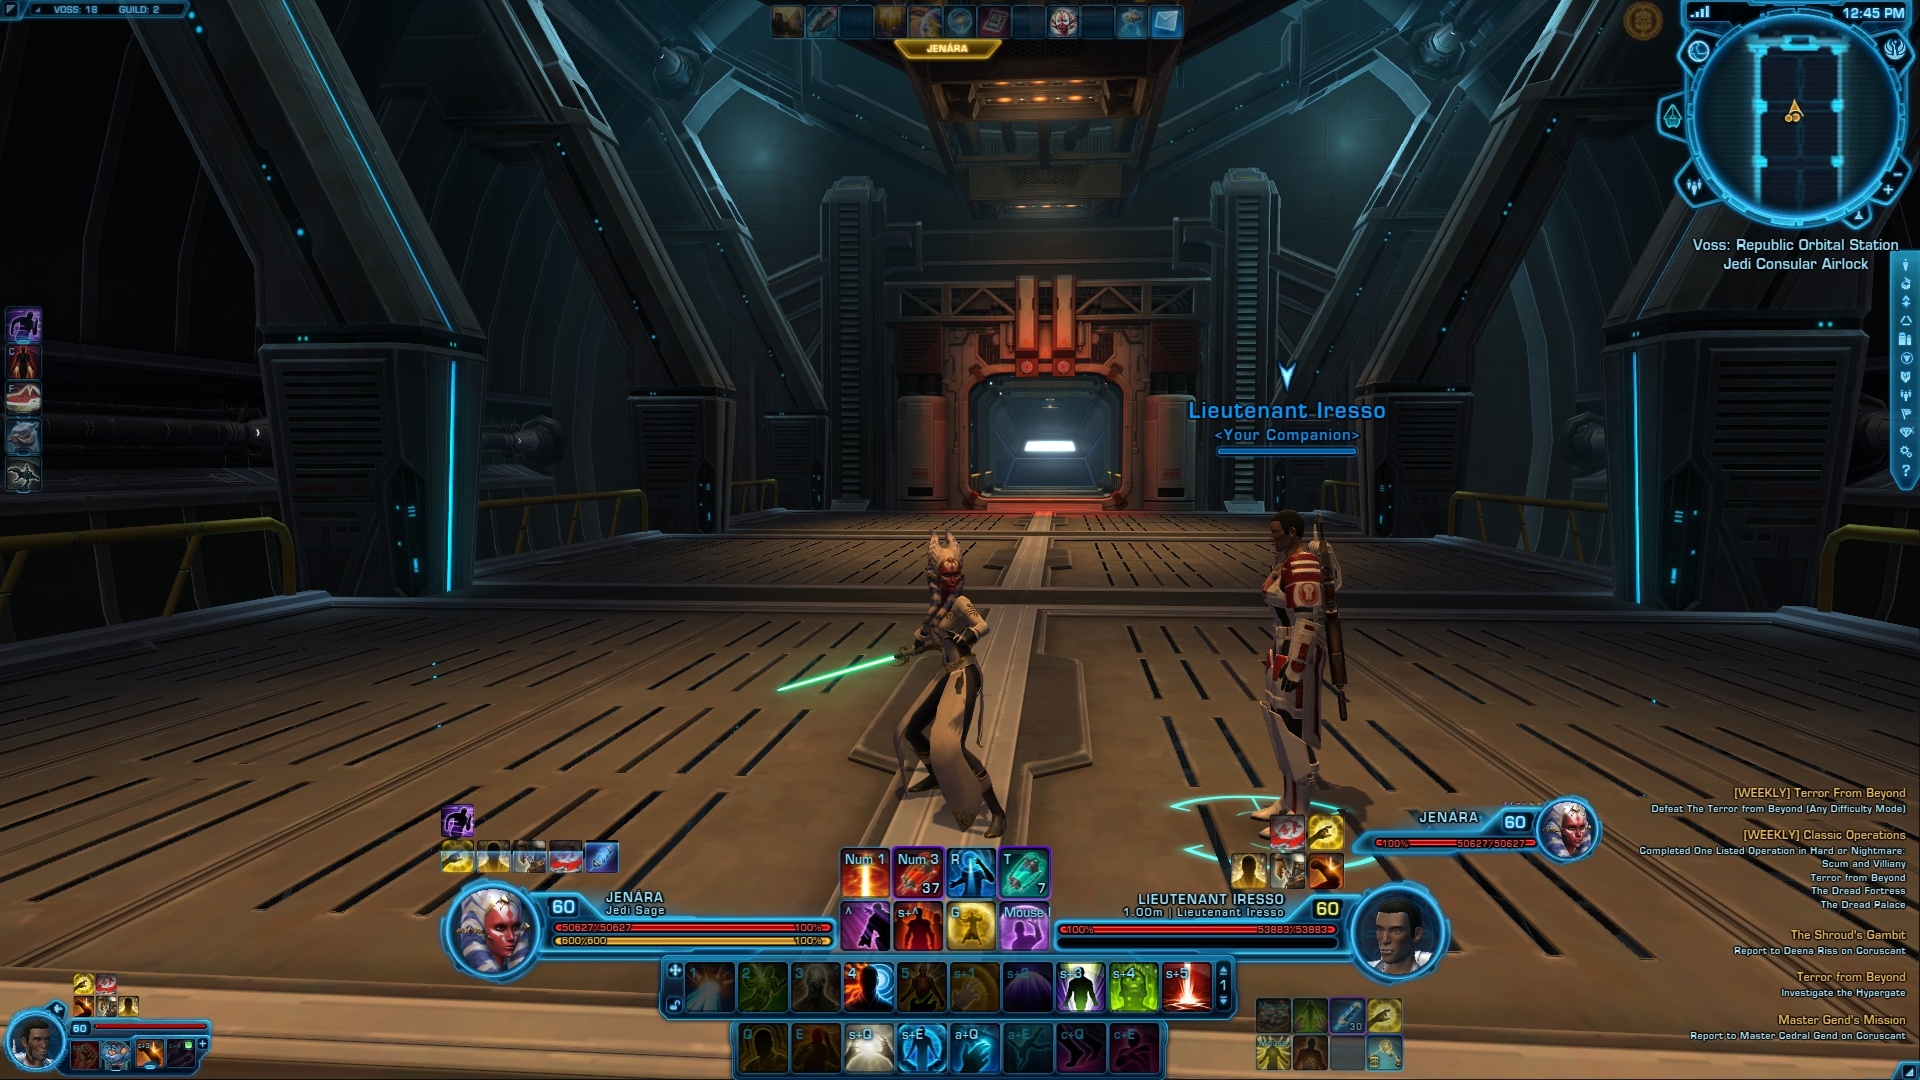
PicturesFile InfoUpdated: 09-04-2015 04:47 AM Created: 09-04-2015 04:47 AM Downloads: 1,155 Favorites: 1 MD5: Hello everyone,Schimaera's simple Sage/Sorc DPS UI
I'd like to share my UI with you.
I tried to make it as simple and plain as possible. The slots for Quickbar 1 and 2 are expandable to 12 of course, if someone decides that they need more skills.
However, for the normal rotation of both Madness/Balance and Lightning/Telekinesis this quickbar setup is sufficient (the latter might need an additional slot in Quickbar 1).
For Lightning/Telekinesis 1-5 should be your burst skills plus one AoE on 5. Shift-1 and Shift-2 are the two DoTs (Crushing Darkness/Mind Crush and Affliction/Weaken Mind).
For Madness/Balance 1-5 are your bread and butter skills and S+1 and S+2 are your fillers (as shown in the image for the Sage).
Quickbar 2 are Utility Skills like breakouts, interrupts, stuns, pushbacks, cleanses and so on.
Quickbar 3 is in the middle between your and your targets health bars and entails your offensive and defensive cooldowns, so that you have a better eye on them.
Note that Num1 and Num 3 (for Force Potency and the Adrenal) in my Screenshot are actual bound to my mouse. The game doesn't register two of its Keys so I bound them to the num block.
Quickbar 4 are minor utiliy skills. Slot 1 and 5 are also on my mouse and are Project and Vindicate (fillers I rarely need). The rest is just stuff I don't need to bind to a key due to it's rare necessity in fights.
Quickbar 5 is for Quicktravels and Priority Transports plus some random stuff like repair bots - always useful to acess there.
Quickbar 6 is for Mounts and Rocket Boost.
The Operations Frame is next to Quickbar 6.
For it's plain look and for more in-depths I decided to not use Focus-Target but it can always be activated.
I hope you enjoy the UI as much as I do.
Best Regards
SchimaeraOptional Files (0)
There have been no comments posted to this file.
Be the first to add one.


Swtorui
AddOn Sites
© 2022 MMOUI